free info divs
here you can find some free copy-paste-able coding for what i am calling info divs! a div is essentially just an empty box that you can put content in. these can be used for babyz/crew pages, or really any element that you would like to repeat in pretty rows on your page. all of the below options include a background image, but you can remove it by simply removing the background-image declaration in the css.
quick tricks & notes
- these are all designed to be super basic so you can use your own images and stylings on them.
- if you want to style the information below the images, you can style the "infodiv" class to affect those elements.
- i have added some notes in the css to help with customizing the code for yourself.
- i strongly recommend using VS code for your web design and coding! it is super user-friendly and makes the code really easy to read and edit.
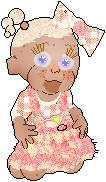
option 1: photos only with background images
you can replace the baby and blue circle images below with your own images. to add another div you can just copy the whole "imgdiv1" div and paste it in whatever order you want it.
HTML:
<div class="infoflex">
<div class="imgdiv1">
<img src="testbaby.png">
</div>
<div class="imgdiv1">
<img src="testbaby.png">
</div>
<div class="imgdiv1">
<img src="testbaby.png">
</div>
</div>
CSS:
.infoflex {
display: flex; /*this is what tells the divs to sit next to each other*/
flex-wrap: wrap; /*this will make the divs wrap to the next line automatically when they reach the end, instead of stretching your page or container*/
gap: 1rem; /*the amount of space you want between the divs, a "rem" is about 16px wide, but you can also use px here instead of rem if you prefer*/
margin: 0 auto; /*this centers your content*/
max-width:max-content;
}
/******** option 1: images with backgrounds *********/
/*note: images should be at least 150px tall - if not add some empty space above the photo*/
.imgdiv1 { /*you can replace 'testbgimg.png' with your own bg image*/
align-self: baseline;
background:url(testbgimg.png) no-repeat center;
min-width: 150px; /* make this the width of your bg image */
text-align: center;
}
option 2: photos with background images plus info on background
you can replace the baby and blue circle images below with your own images. to add another div you can just copy the whole "imgdiv2" div and paste it in whatever order you want it.
firstname middlename
born 1/2/03
hexed by lacey
firstname middlename
born 1/2/03
hexed by lacey
firstname middlename
born 1/2/03
hexed by lacey
HTML:
<div class="infoflex">
<div class="imgdiv2">
<img src="testbaby.png">
<div class="infodiv">
<p>firstname middlename
<br>born 1/2/03
<br>hexed by lacey</p>
</div>
</div>
<div class="imgdiv2">
<img src="testbaby.png">
<div class="infodiv">
<p>firstname middlename
<br>born 1/2/03
<br>hexed by lacey</p>
</div>
</div>
<div class="imgdiv2">
<img src="testbaby.png">
<div class="infodiv">
<p>firstname middlename
<br>born 1/2/03
<br>hexed by lacey</p>
</div>
</div>
</div>
CSS:
.infoflex {
display: flex; /*this is what tells the divs to sit next to each other*/
flex-wrap: wrap; /*this will make the divs wrap to the next line automatically when they reach the end, instead of stretching your page or container*/
gap: 1rem; /*the amount of space you want between the divs, a "rem" is about 16px wide, but you can also use px here instead of rem if you prefer*/
margin: 0 auto; /*this centers your content*/
max-width:max-content;
}
/******** option 2: images with backgrounds plus info on background *********/
.imgdiv2 { /*you can replace 'testbgimg.png' with your own bg image*/
align-self: baseline;
background:url(testbgimg2.png) no-repeat center top;
height: 300px; /*make this a lil taller than your bg image*/
min-width: 250px; /* make this the width of your bg image */
text-align: center;
}
option 3: photos with background images plus info in seperate box below background
you can replace the baby and blue circle images below with your own images. to add another div you can just copy the whole "fulldiv3" div and paste it in whatever order you want it.
firstname middlename
born 1/2/03
hexed by lacey
firstname middlename
born 1/2/03
hexed by lacey
firstname middlename
born 1/2/03
hexed by lacey
HTML:
<div class="infoflex">
<div class="fulldiv3">
<div class="imgdiv3">
<img src="testbaby.png">
</div>
<div class="infodiv">
<p>firstname middlename
<br>born 1/2/03
<br>hexed by lacey</p>
</div>
</div>
<div class="fulldiv3">
<div class="imgdiv3">
<img src="testbaby.png">
</div>
<div class="infodiv">
<p>firstname middlename
<br>born 1/2/03
<br>hexed by lacey</p>
</div>
</div>
<div class="fulldiv3">
<div class="imgdiv3">
<img src="testbaby.png">
</div>
<div class="infodiv">
<p>firstname middlename
<br>born 1/2/03
<br>hexed by lacey</p>
</div>
</div>
</div>
CSS:
.infoflex {
display: flex; /*this is what tells the divs to sit next to each other*/
flex-wrap: wrap; /*this will make the divs wrap to the next line automatically when they reach the end, instead of stretching your page or container*/
gap: 1rem; /*the amount of space you want between the divs, a "rem" is about 16px wide, but you can also use px here instead of rem if you prefer*/
margin: 0 auto; /*this centers your content*/
max-width:max-content;
}
/******** option 3: images with backgrounds plus info seperately/below bg *********/
.fulldiv3 {
align-self: baseline;
min-width: 150px;
width: min-content;
}
.imgdiv3 { /*you can replace 'testbgimg.png' with your own bg image*/
background:url(testbgimg.png) no-repeat center;
min-width: 150px; /* make this the width of your bg image */
text-align: center;
}
.infodiv {
text-align: center;
}